Add the NetSheet™ Always-on Widget to your WordPress website
The NetSheet™ Always-on Widget is a little widget that will appear on the pages of your website. Your prospects and clients will be able to generate Seller Net Sheet estimates on the fly. It looks like this:

Step 1 – Get the Code Snippet
Go to the NetSheet™ home page: https://www.netsheet.com/
Sign in to your account as seen below:

After logging in,
Go to Lead Capture Settings:

Click the button below to access your Always-on Widget HTML Code.

Click the Copy Code button as seen below to copy the code in the grey box.

Word of caution! If you email this code to anyone, like your web developer, please make sure to paste this code into a separate Notepad file and attach it to the email. Microsoft Word® and other text editor programs and email programs may re-format the code and make it invalid for deployment.
Programs like Notepad, Notepad++®, Sublime®, and Gmail® are sufficient for these purposes.
Add your Always-on Widget to all pages of your WordPress website.
IMPORTANT TO NOTE: Due to the peculiarities of different WordPress themes, there might be different ways of installing floating widgets to all pages.
Here are the three options of how to do it.
Pick the one that is right for you!
Step 2 – Install it on WordPress
The first way is the most universal one.
OPTION #1
Adding Always-on Widget via Theme Editor
Go to the WordPress website's backend
Log in to your WordPress website's backend. Go to the Appearance tab in the left-hand menu and click
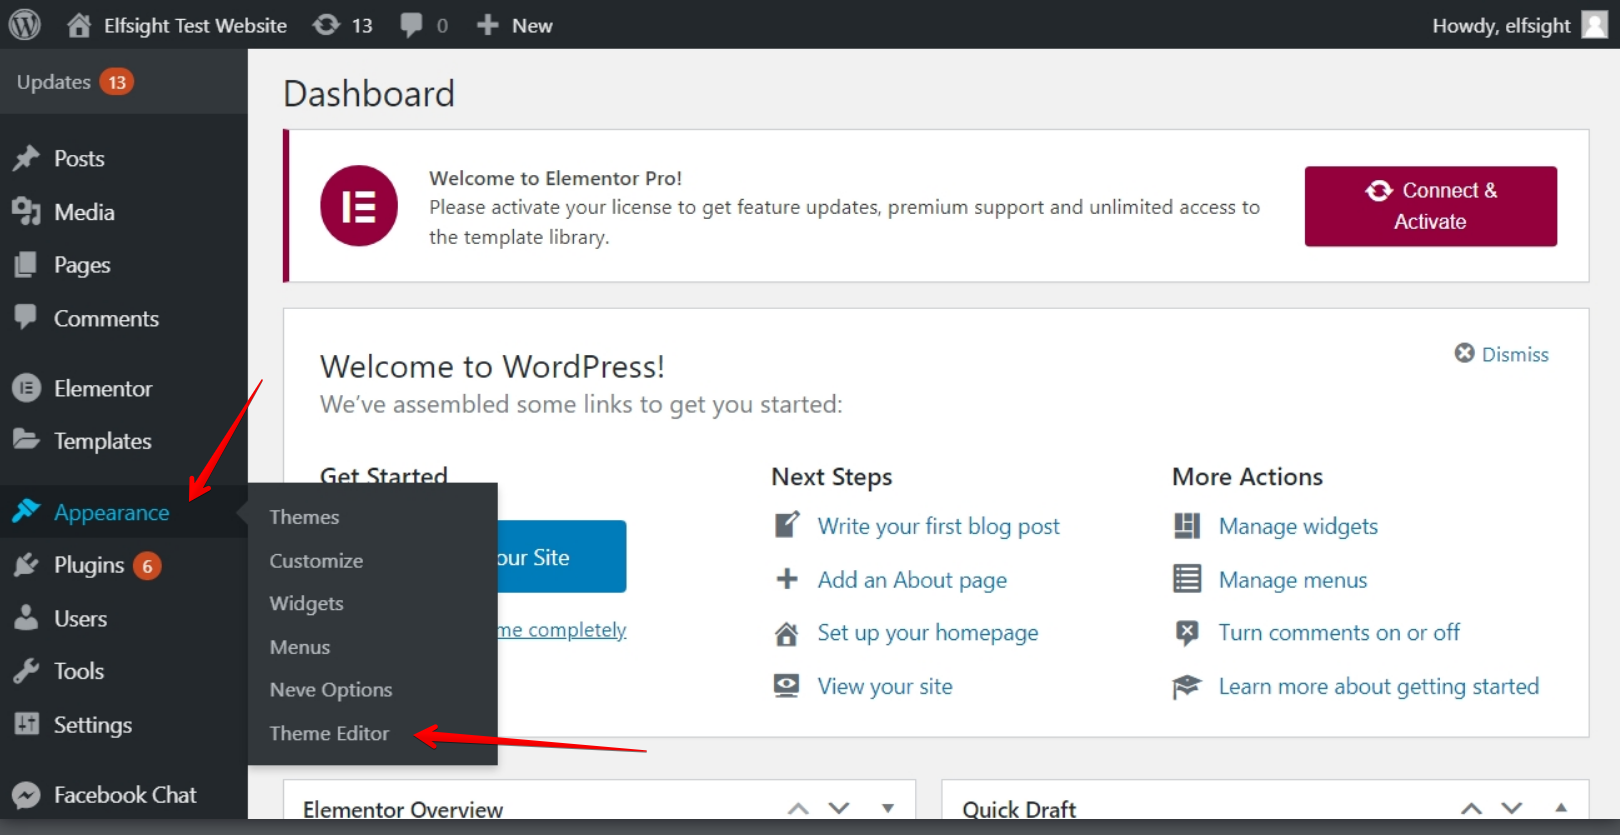
Theme Editor:
2. Add the installation code
Choose the footer.php file (1) in the right-hand menu of Theme Files, insert the code before the closing </body> tag (2), and press the Update File button (3):
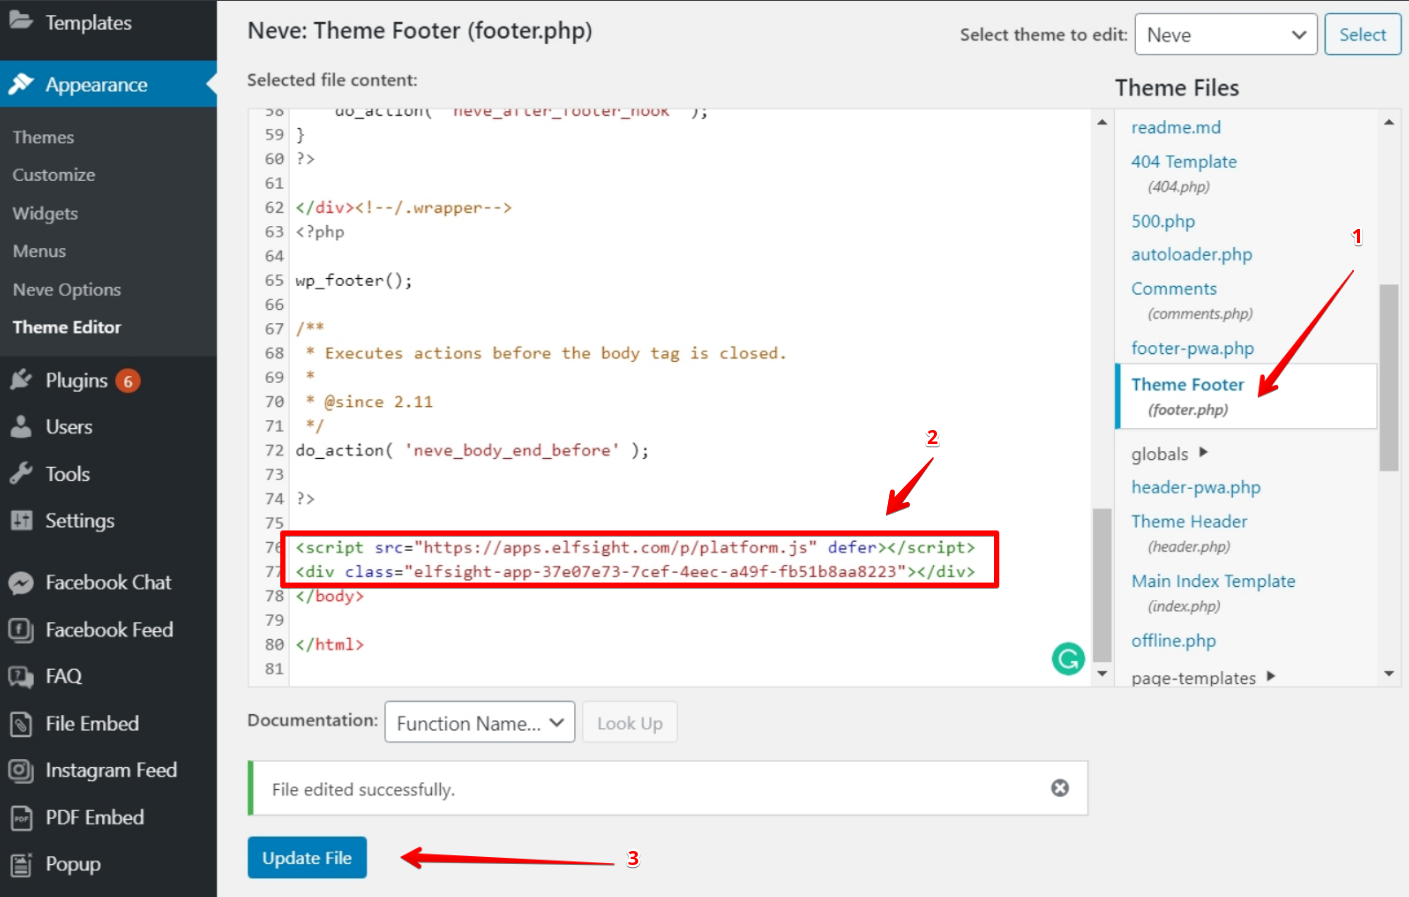
You have successfully added the Always-on Widget to all pages of your WordPress website!
OPTION #2
Adding Always-on Widget via Widgets option
Go to the WordPress website's backend
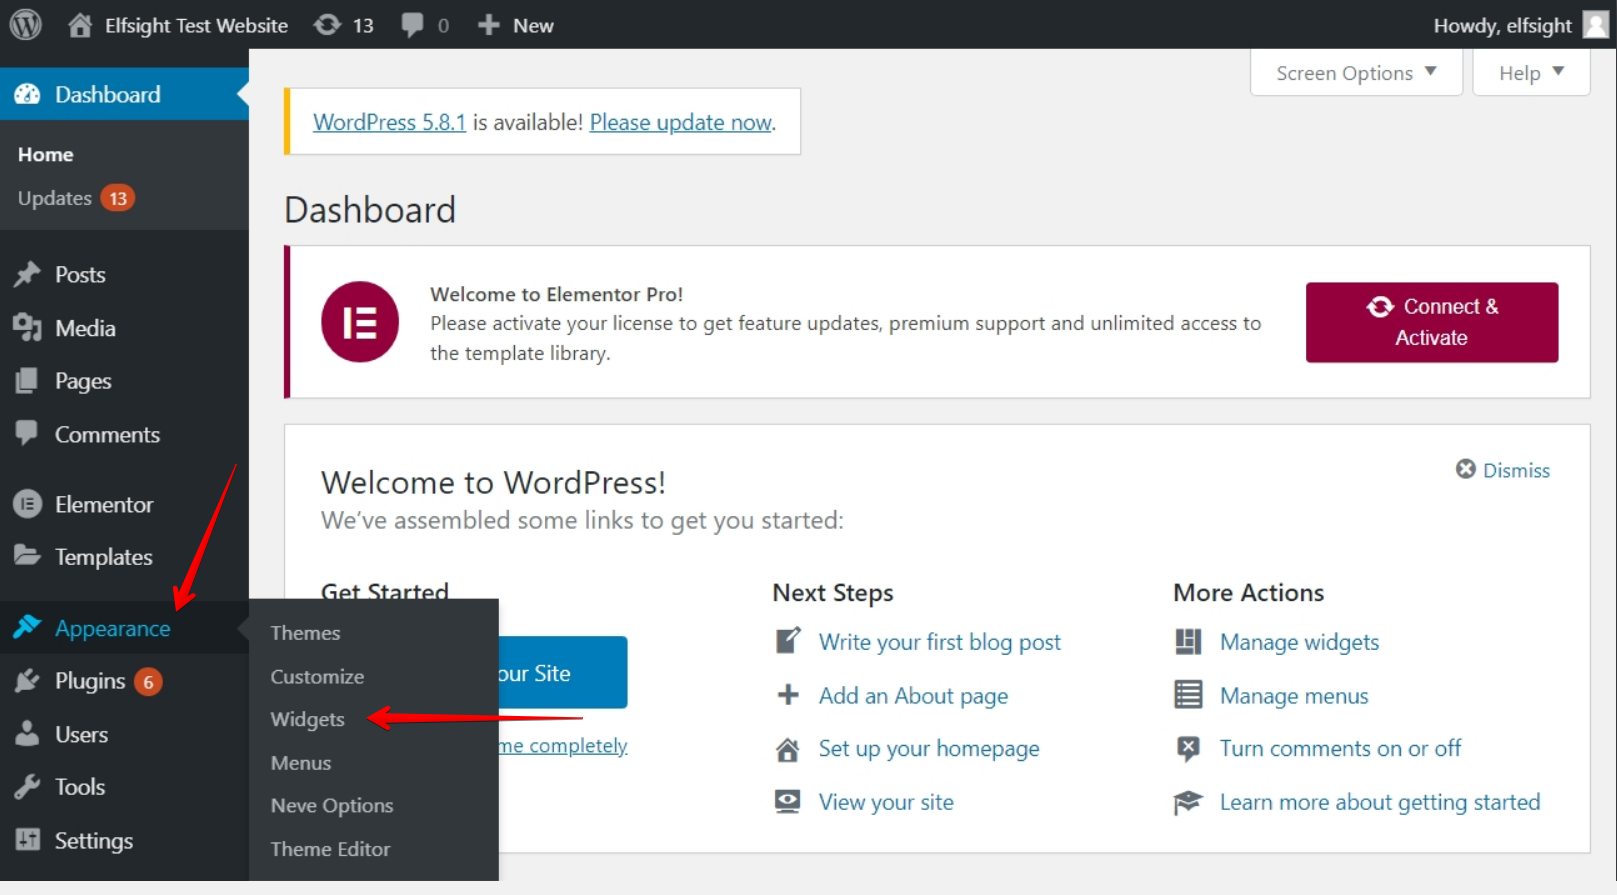
Log in to your WordPress website's backend. Go to the Appearance tab in the left-hand menu and click Widgets:
2. Choose the placement for the code
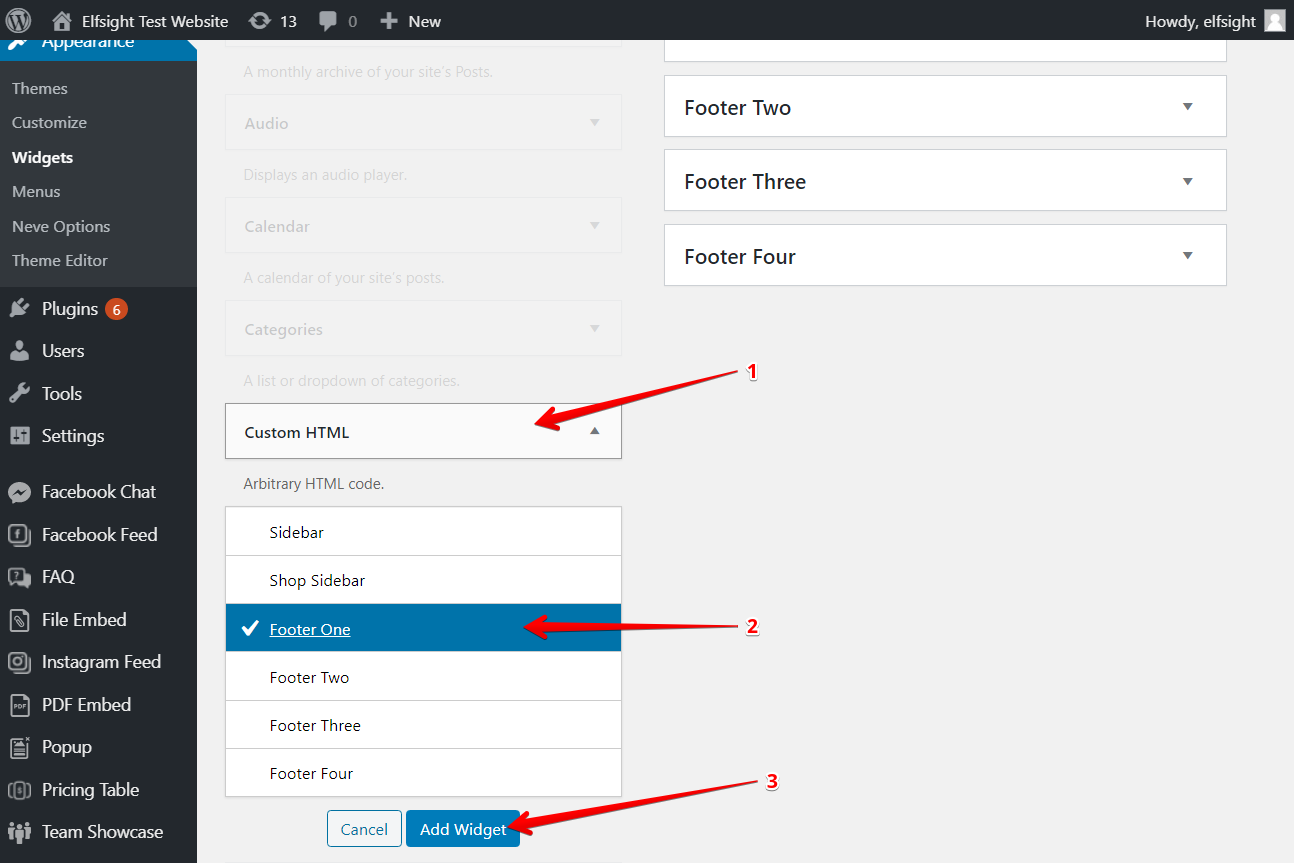
Open Custom HTML (1) in the Available Widgets list, choose one of the Footers in the drop-down menu, for example, Footer One (2) and click the widget button.
3. Paste the installation code
Paste your installation code to the Content field, and click the Save button to apply changes:
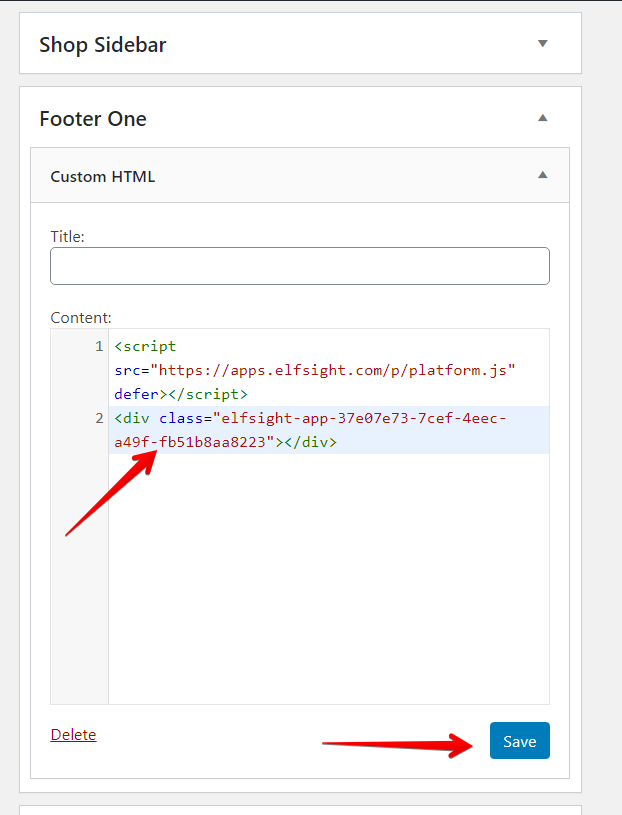
You have successfully added the Always-on Widget to all pages of your WordPress website!
OPTION #3
Adding Always-on Widget via Customize option
Go to the WordPress website's backend
Log in to your WordPress website's backend. Go to the Appearance tab in the left-hand menu and click
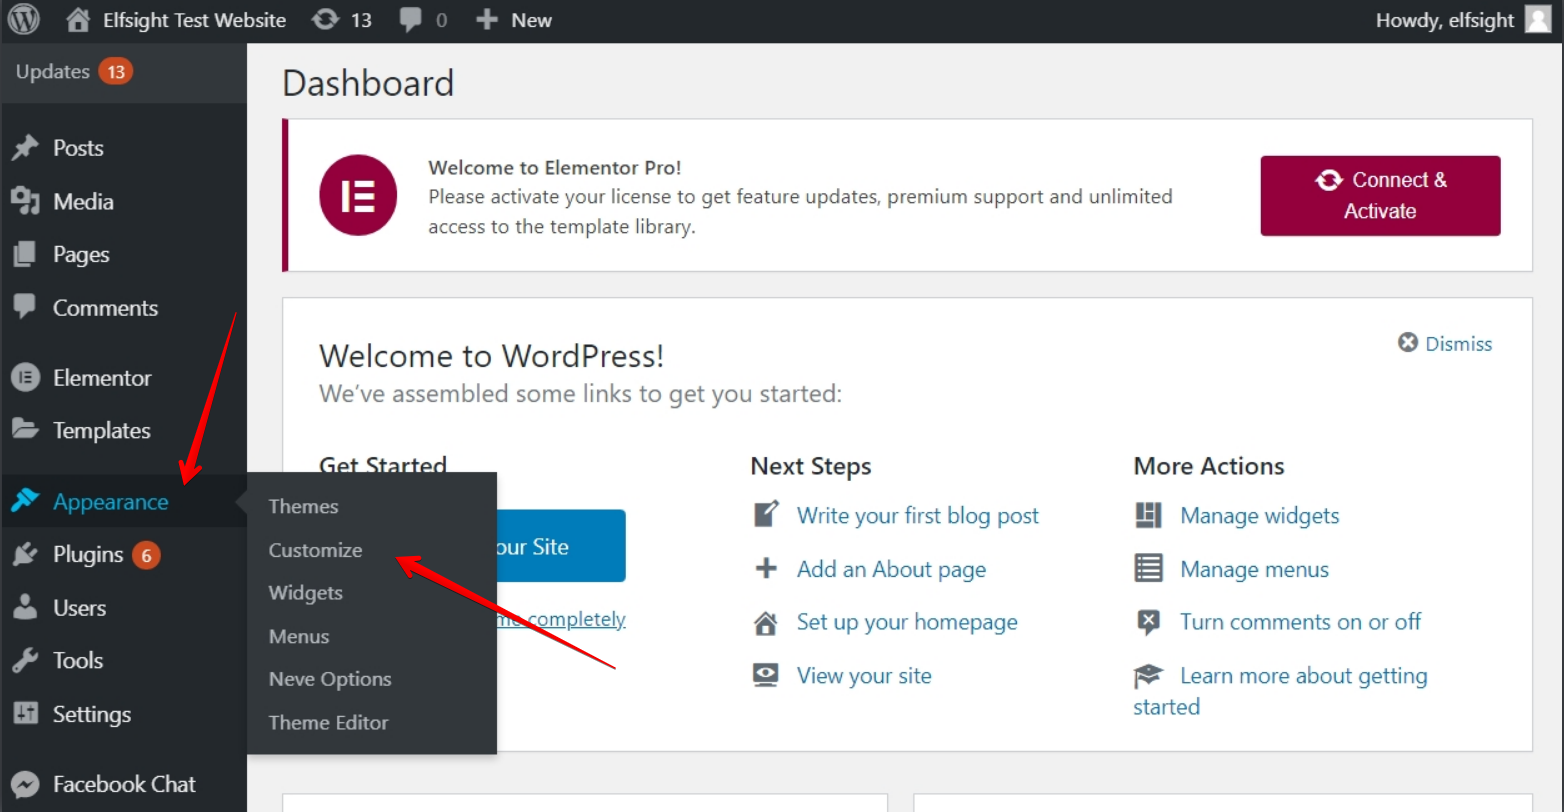
Customize:
2. Add Custom HTML element
Choose Widgets in the left-hand menu:
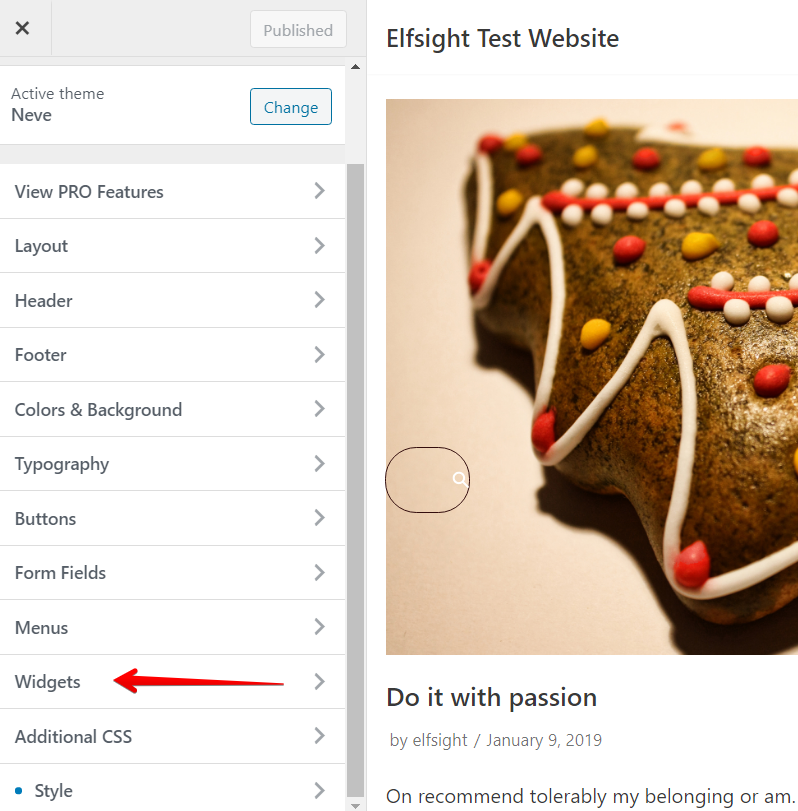
Click Add a widget at the bottom of the menu and select
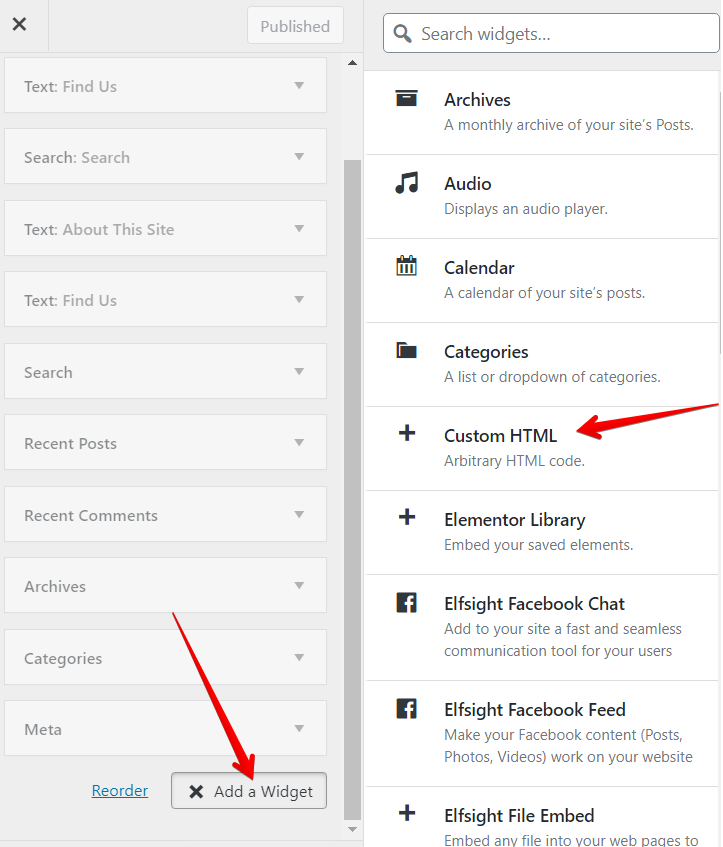
Custom HTML in the menu which appears.
3. Paste the installation code
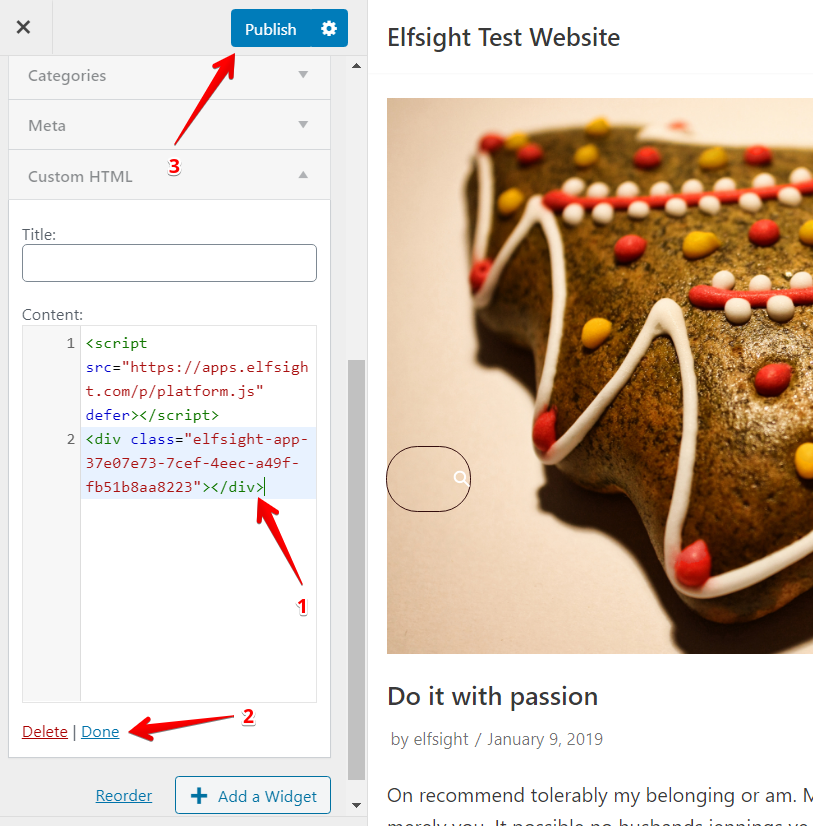
Paste your installation code to the Content field (1), click Done (2), and press the Publish button (3) to apply changes:
Well done! You have successfully added the Always-on Widget to all pages of your WordPress website!
And test to see that your website has the newly added NetSheet™ Always-on Widget. It should look like this on the bottom-right corner of your website on all of your pages:

And when you click on it, it should look like this:

Test to see that the widget shows on all pages. If not, repeat the step above and add the code to another footer or section to see if that works.
Finally, try and create an estimate with the widget. If it shows correct values, you are now done!
Congratulations on setting up your new NetSheet™ Always-on Widget!
